Per your request, here is the tutorial:


Following the design above, dashes mean score; solid lines mean cut


Here's another picture showing you how the folds are overlapped.

For the Cover, score 2" all around the 8"x8" paper and then cut at the four corners. You will be creating 4 cuts altogether (see picture above).
For the inside cupcake holder, score 1" all around the 5 3/4" paper and then cut at the four corners. Then using a die cut machine or punch, cut a 2" centered circle (I used a Nesti).

Finish off the box by adhering the four corners.


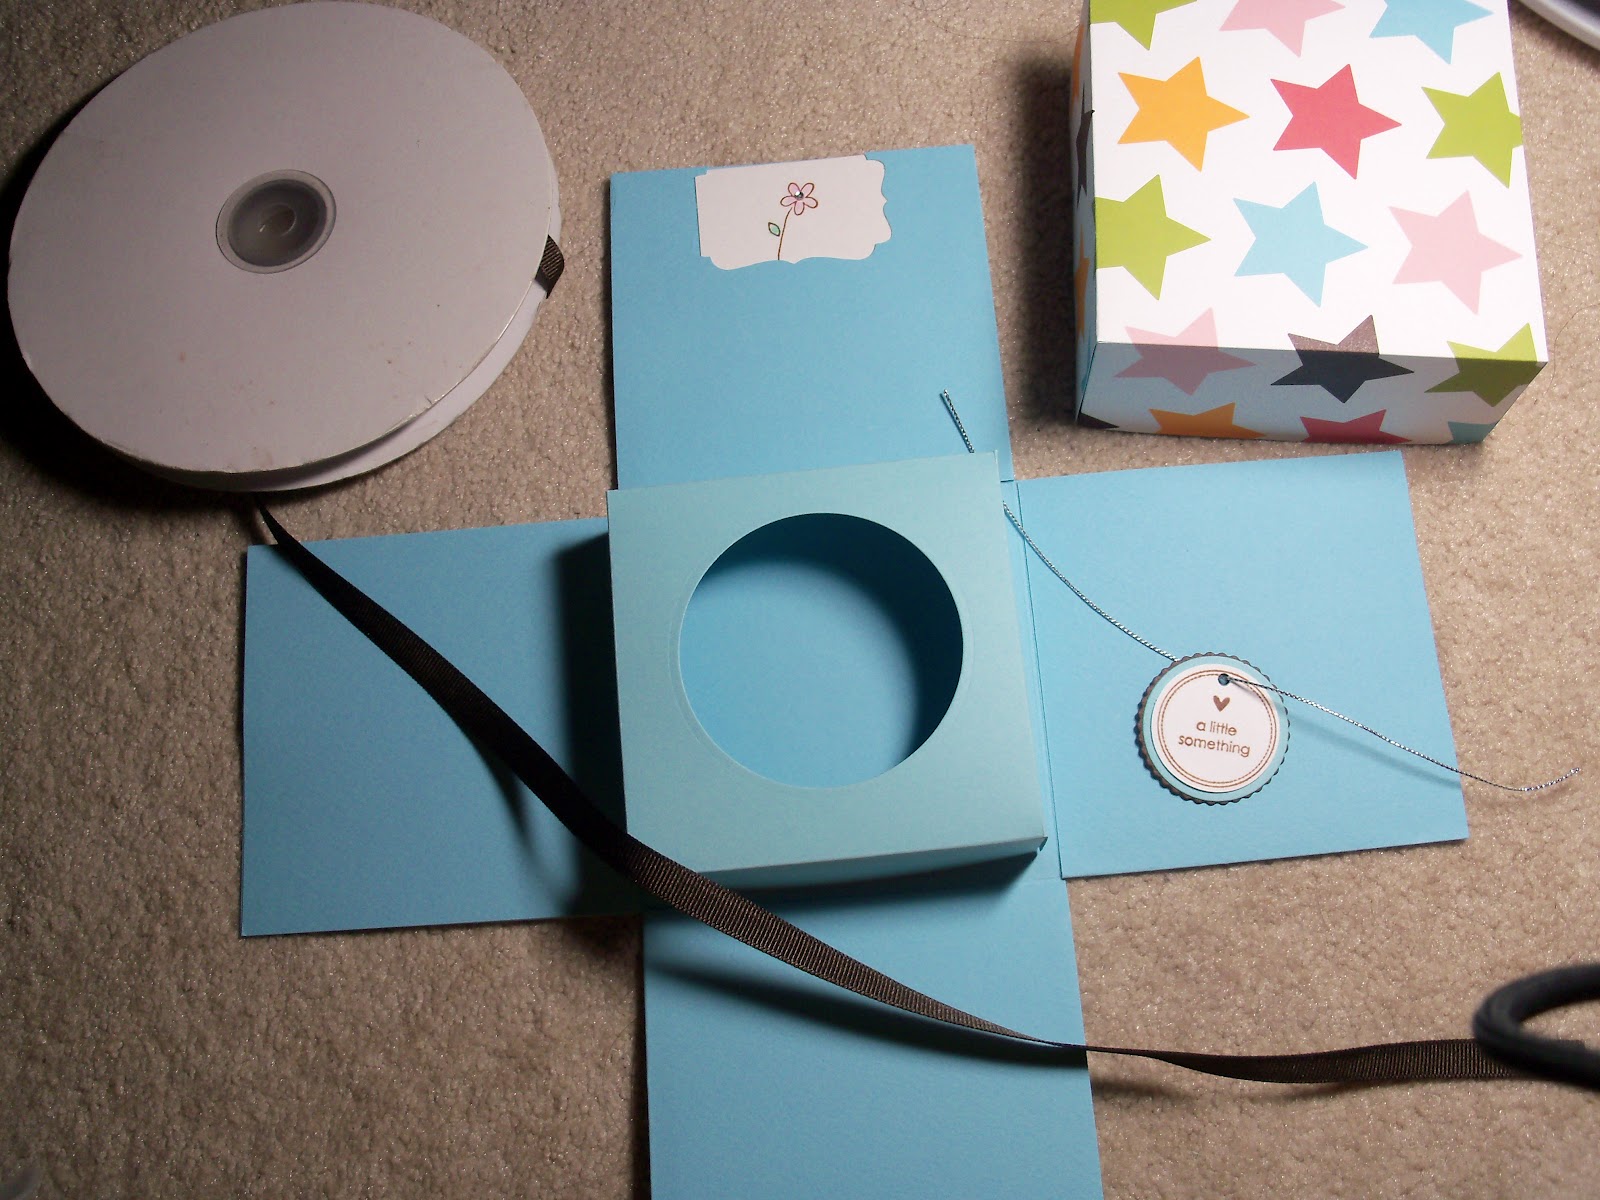
Place the card inside the pocket created by the SU Decorative Label Punch. Place your cupcake holder inside the box.

Fold up the four flaps and place your cover on top of the box.
Tie a ribbon over the box and a pretty tag. (SU tag from the Matchbox messages set.)
Now all you need is the cupcake.

Thank you for stopping by!
1 comment:
Fran, thanks for the tutorial. I received a cupcake box exactly like the one that you made but I have not had to time to make one yet. I was think that I would probably need to take apart the one that I received to make one. I guess I don't need to now. :)
Post a Comment
Thank you for taking the time to comment! I appreciate YOU!